Gudrun Polak is an awe-inspiring and very inventive weaver, of both loom and card-weavings. Her weaving website is called The Loomy Bin. It’s a great resource— it has animated pattern-planning weaving programs as well as pattern libraries (for both card- and loom weaving). She’s also the mainstay of the braiding study group in the weaving guild I belong to—the Santa Cruz Handweavers Guild.
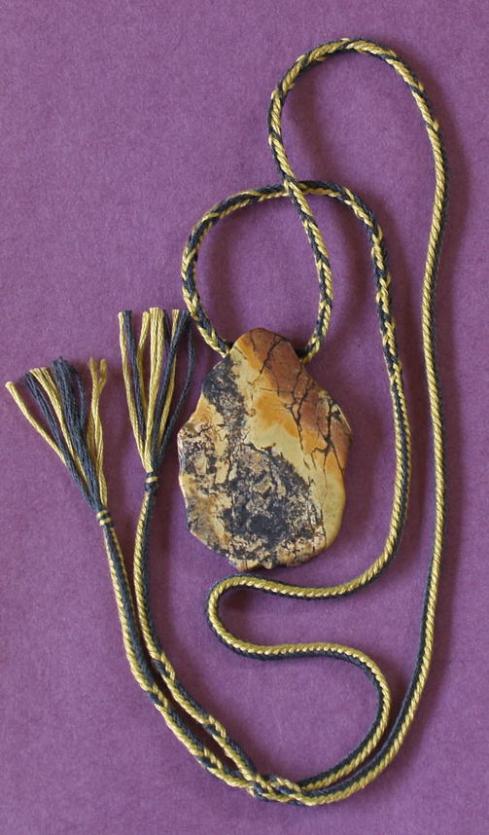
Here’s a loop-braided necklace that Gudrun made recently, using 5 bicolor loops in various patterns:
The pendant is yellow turquoise from China. The braid colors highlight the color and markings of the stone perfectly.
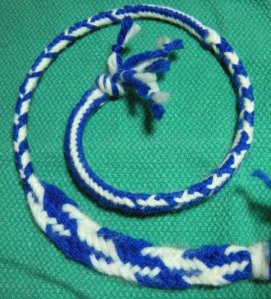
Gudrun’s main braiding focus has been sling braids, and she’s designed some gorgeous ones. The two below echo some of the patterns she uses in card-weaving (click to enlarge):
Sling braids, designed and made by Gudrun Polak
Click on the Andean braid links in Gudrun’s online gallery to see more of her sling braid designs. (I love the ones that look like a swirl of piano keys!)
Sling braids are really impressive-looking braids—dense, often square in shape, with very intricate patterns. They are braided with free ends, not loops. Traditionally, the braid is held in the left fist and braided upward by the right hand, with the growing braid hanging down from the fist. This braiding technique is known from only two places in the world—the Andes and the Himalayas—and used for thousands of years to make the exact same thing, a type of weapon called a sling. To me, that seems an incredibly strange coincidence! (“thousands of years” is documented in the Andes, I doubt there is evidence quite that old from the Himalayas simply because narrow textiles almost never survive that long.)
Laverne Waddington has tutorials for two sling braids on her blog, done in the traditional manner on the fist, which is also the way Gudrun braids them.
[Update – See my sidebar’s ‘BRAIDING LINKS’ to find 2 new links to sling braid tutorials. You might want to learn one of the 16-strand braids before learning Laverne’s 24-strand sling braids]
Sling braids can be made as a kumihimo technique as well, either on a marudai (round braiding table), or on a card with slits. Rodrick Owen teaches all three methods (if requested) in his workshops.
Below are some of Gudrun’s loop braid samples: Two square braids with bicolor patterns and two six-loop, flat double braids. Don’t miss the zipper pull! It looks great on the sweater, but not only that, Gudrun has used a very clever way of attaching it:
Gudrun’s two-loop closure method
“Can you see that I split [the braid] twice in the middle and pulled the ends through? It locks and there is no knotting required. This may be a great way to make any closure, even for a necklace.”
Look closely, near the middle of the little purple braid above, and you’ll see two divided areas like little buttonholes. She’s pulled one end of the braid through the metal tag, then down through one of the divided sections in the braid, until the second divided section got pulled through the first. Then she inserted the other end of the braid through the second divided section and pulled that end through.
I think she used this same closure on her necklace in the first photo. There, she put a loop near each end of the necklace, pulled one end through the other loop, and then that other end through the first end’s loop…
[I’ve tried this fastening method now on a hefty drawstring for a bag, and a little bracelet, and it worked great for both! Locks and holds firm when pulled from either direction, yet is easy to undo. I think the knot it forms is a square knot (?), but much less bulky than a tied square knot, plus easier to undo. Braid a short loop (meaning a buttonhole/ divided area) near each end of a braid, but leaving a “tail” below each loop. Using those holes, pull one end through the other, then pull that ‘other’ end through the first one. Actually, the first end doesn’t necessarily need to have a “tail” but the second one does.]
Julie Tamura does a wide variety of textile techniques, from weaving to kumihimo braiding to embroidery. She had already done some loop braiding before finding my blog, and quickly learned several braids (including lace dawns) from my tutorials. Here’s a photo of one of her loop braid samples—this is a 5-loop bicolor pattern sampler, that starts out as a square braid and morphs into a flat braid:
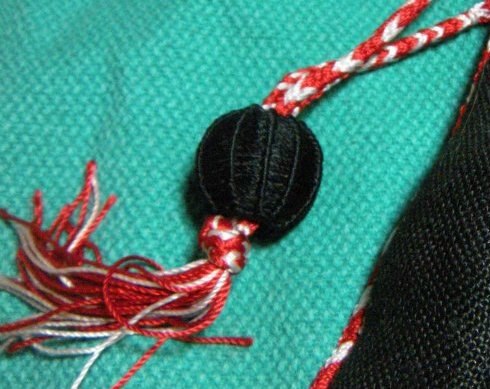
Here are some photos of an amazing purse that Julie made from linen and silk. She embroidered it with silk thread, and loop-braided all the drawstrings and trim.
She even made the “ball” buttons!
I’ve seen pictures of purses similar to this one, very ornate, with loop-braided drawstrings and handles, from 17th Century Europe and earlier—now museum artifacts. Here’s a photo of 15th C. purse, in a report by Noémi Speiser on L-MBRIC. L-MBRIC also has an article on loop braiding in Indonesia showing photos of traditional purse-type bags with interesting loop-braided closures and carry-straps, so this seems to be a worldwide use of loop braids.
Annie MacHale (aspinnerweaver) made her own blogpost of her beautiful, very first loop braids that she learned not from my blog, but from one of my workshops. Usually she and I are classmates—we both take backstrap weaving workshops from Laverne Waddington. Annie is the Queen of Inkle Bands—that’s what Laverne has christened her. Her blog is always a feast for the eyes, as is her work. What I also love are all her ideas for things that can be made out of narrow textiles—check out her bootlaces! She has a long list of possible uses for narrow bands—see the link in her sidebar. She has two Etsy stores for her weavings, one is specifically geared towards sashes for ‘mountain men’ type reenactors, while the other has everything else—guitar straps, bracelets, scarves, sashes, even clips and finishings for turning your own bands into guitar straps, leashes, wristbands, etc. [update—she now has a store site for her handwoven guitar straps as well: Weaver Guitar Straps]
Well, I had been planning to include a very different contribution from a reader at this point—a set of braid instructions—but I haven’t had a chance to make enough samples of it yet, so this “readers gallery” series will continue in a later post.
© 2012–2015 Ingrid Crickmore
See full copyright restrictions and permissions at the bottom of the sidebar (if you are on a small screen device, the ‘sidebar’ may appear somewhere other than at the side of the screen). Photos of braids made by others may not be shared in any way without explicit permission from the maker of the braid. Photos of my own braids, and of other content of this website may be shared in limited and specific ways, see full copyright.


Isn’t it nice to see what your students do with the ideas and techniques that they learn from you? Gudrun does nice work! Julie’s little bag is sweet!
Thanks for the links to my blog and shops.
It is beyond nice! actually kind of humbling, because I so rarely make any actual finished objects, myself. It’s usually just samples, samples, samples. But I do want to braid a necklace for that pendant I bought off your recent post of New Mexico etsy’ers…It just came, and I really like it!