Actually this tutorial itself isn’t particularly unorthodox! 😉 It’s the braid that’s unorthodox. That’s Noémi Speiser’s term for a fingerloop braid in which loops are passed through some loops, but completely over (or under) other loops. That’s all it means – it doesn’t mean that the braid is uncommon, or difficult to make.*
In fact, the most common fingerloop braid worldwide was probably a five-loop Unorthodox braid – the one called “a broad lace” in the medieval loop braiding manuscripts. That’s not the braid I’m teaching here, though.
This tutorial is for a 7-loop D-shaped braid, of a slightly different type than the most common unorthodox braid. I’ve only come across a couple of historic reference to this type* of braid. Yet it’s no harder to make than a 7-loop square braid. Learn the 7-loop square braid first, though – this D-shaped braid video assumes that you already know how to braid a 7-loop braid, just teaches the parts that are different for this D-shaped version. (jump to D-shaped Braid video – the loop set-up directions for the video’s two color-patterns are immediately below the video.)
It has a lot of color-pattern possibilities–the one below looks quite different from both of the braids in my video, but it’s really the same braid, with a different arrangement of colors in the initial set-up of the loops.
[Update: After following my video tutorial further down, you can learn the color set-up for the braid below, (as well as three other D-shaped braid color-patterns) here.]
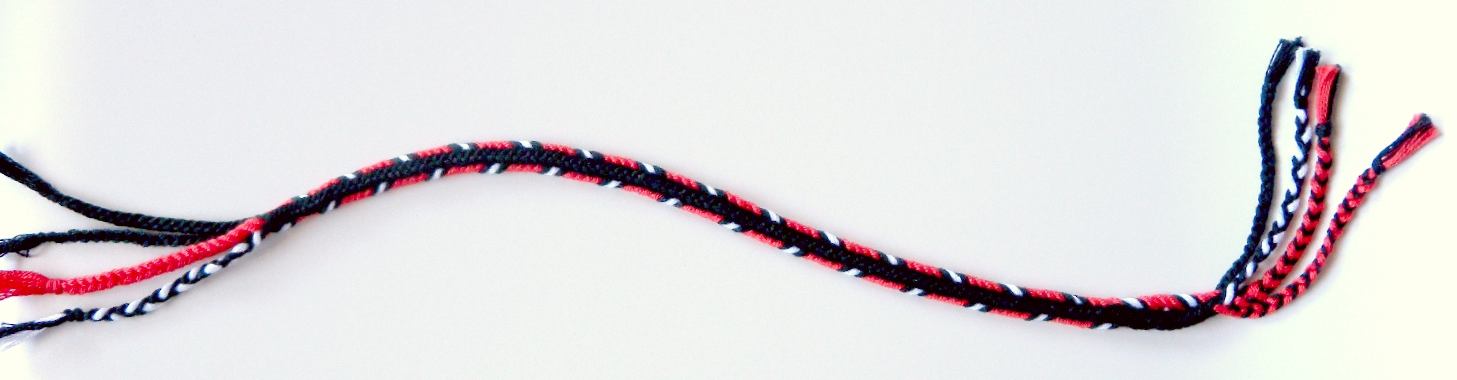
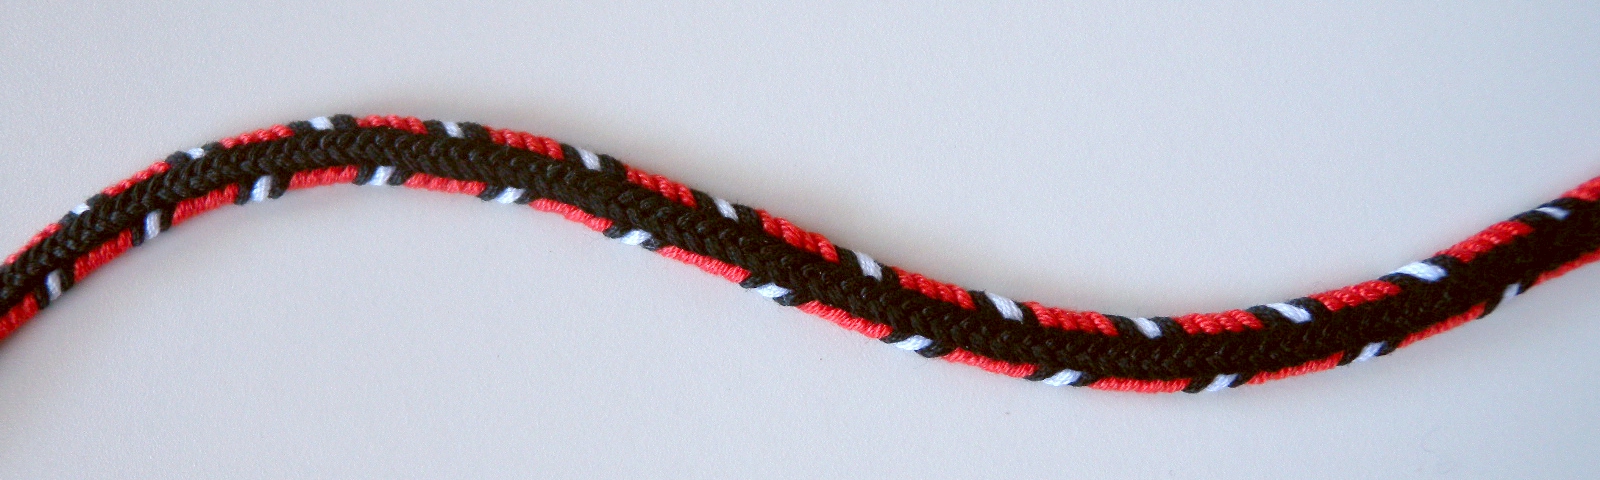
D-shaped braid–a different type of braid from the more well-known “broad lace.” (Top view) The ‘D-shape’ isn’t apparent in a flat photo, but the black center line down the braid is higher, and the colors slope down to the edges of the braid.
There’s only one little part of the braiding moves that’s different from a 7-loop square braid. (By the way, this tutorial only teaches that one slightly different part. Learn how to braid ‘regular’ 7-loop braids here.)
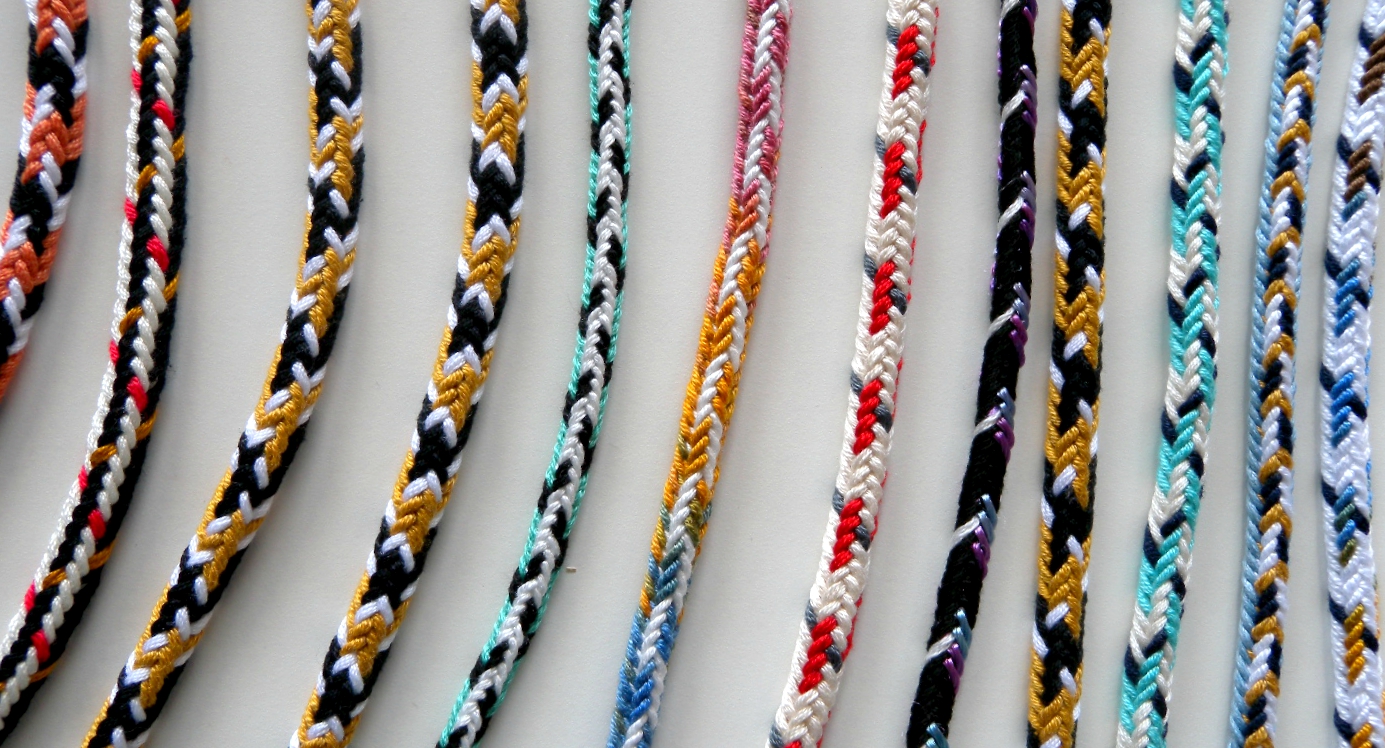
In preparing this tutorial, I braided up a lot of different color-pattern variations for the two braids in my videos. Here’s a shot of a few of them:
In some of these braids the loops were turned while being braided, and in others the loops were not turned. This doesn’t give the same results as with square braids! Sport-weight multi-strand mercerized cotton yarn (most braids).
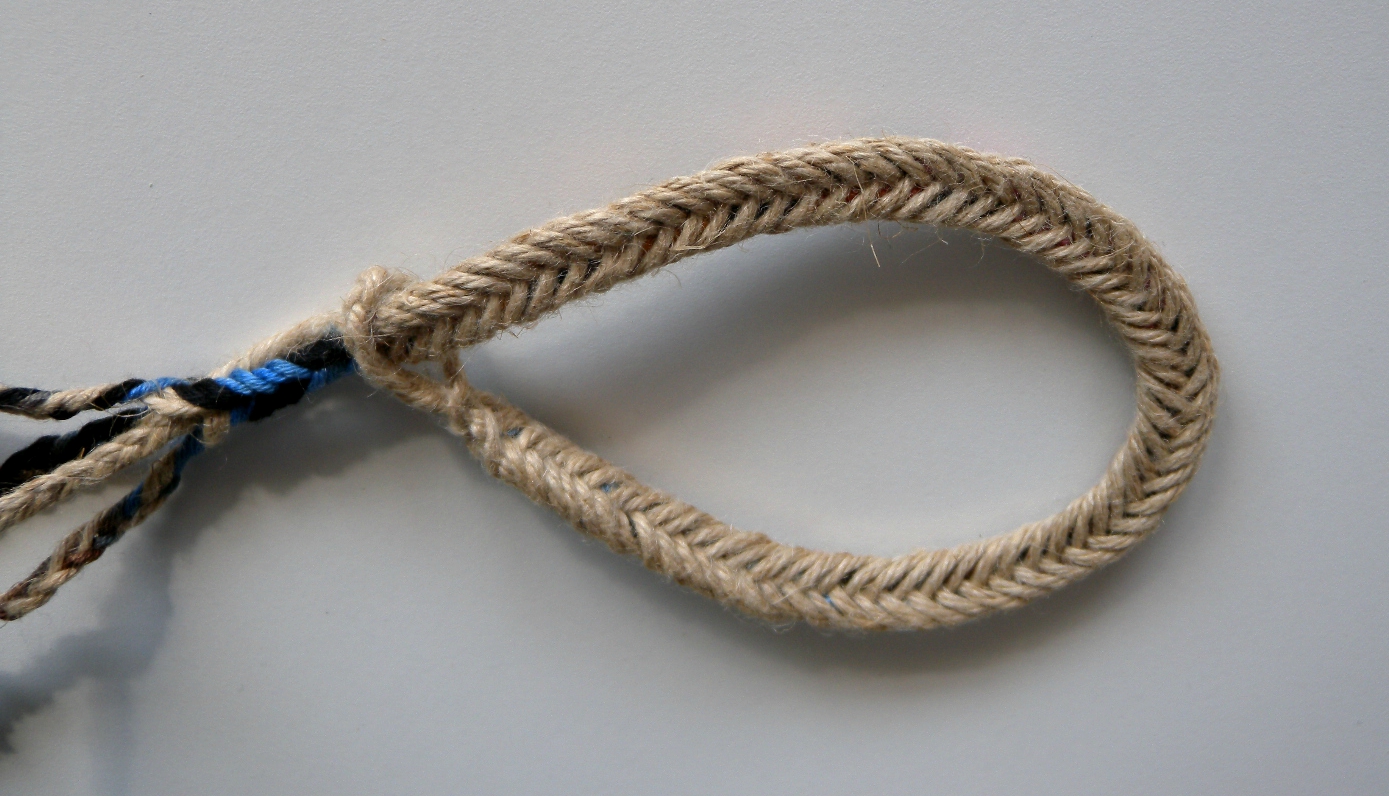
The shape of this braid is neither square nor round. The lower surface is flat and slightly wider than the equivalent square braid of seven loops would be. The upper surface seems domed/ rounded, which is why I call the braid ‘D-shaped.’ This is very clear in person, but doesn’t come through well in photos. Maybe the photos below will give a better idea. The braid was made with Chinese knotting cord, which is much stiffer than yarn, so I was able to pose the braid sort of freestanding to try to show it from all sides:
Unorthodox 7-loop braid, showing flat lower surface and rounded upper surface. (made with Chinese knotting cord)
Here’s a shot of it wrapped twice around my wrist:

One of the fun things about this particular type of Unorthodox braid is that you can make it with one color on the bottom surface and a mix of different colors on the top surface. This is done by using bicolor loops, and not turning any of the loops that you move while braiding. In a square braid, that would make the braid divide into two separate layers, but that doesn’t happen with unorthodox braids.
You can choose to let the bottom surface stay that one color for the whole length of the braid, or you can decide to turn the loops for certain sections of the braid so the upper and lower colors switch places – see the shots below showing the upper and lower surfaces of the same braid:
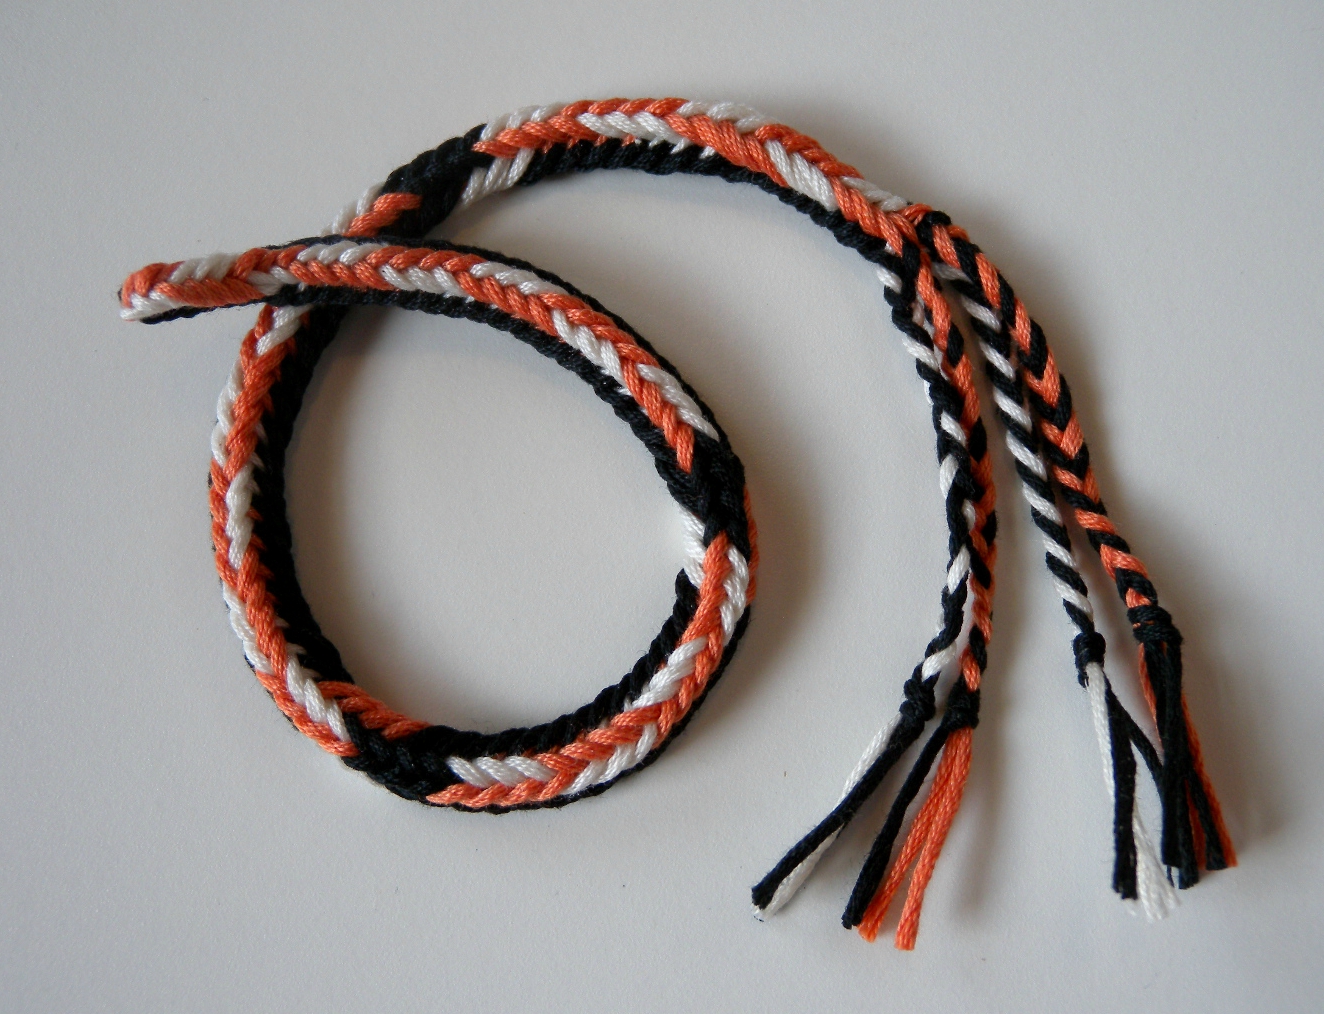
4 bicolor black/orange loops, 3 bicolor black/white loops. Upper and lower surface colors were “flipped” three times. (Sport-weight multi-strand mercerized cotton yarn)

Reverse side. While in progress, this side was facing down, but you could choose to make it the “right” side.
I braided most of my samples using smooth, mercerized cotton yarn about twice as heavy as embroidery floss (all discontinued brands that I’ve had lying around for years). Using doubled strands of embroidery floss gives the same effect – I sometimes use both in the same braid. Along the way I also made a few samples using Chinese knotting cord (a synthetic blend of some kind), and some with waxed cotton cord, which is another firm, semi-rigid braiding material.
Then it suddenly occurred to me to try using two totally different types of thread in the same braid – one for the bottom surface and one for the upper surface! The braids in the photo below have stiff waxed cotton cord for the bottom, and silky mercerized cotton floss or knitting yarn forming the top of the braid:
Center braid: thin waxed cotton cord (brown, 0.5mm) and cotton embroidery floss. Other two braids: thicker waxed cotton cord (light blue, 1mm) and sport-weight cotton yarn.

This is the first color-pattern my video teaches (though not with the waxed cotton cord of this example).
Waxed cotton cord looks and feels very leather-like and rugged, so as bracelets these have a nice firm heft to them. And the contrast between the two types of thread gives the top of the braid an almost beaded or embroidered look.
Waxed cotton and chinese braiding cord are tricky to tighten* — learn the braiding moves with cotton yarn or embroidery floss before trying to braid with stiffer cord.
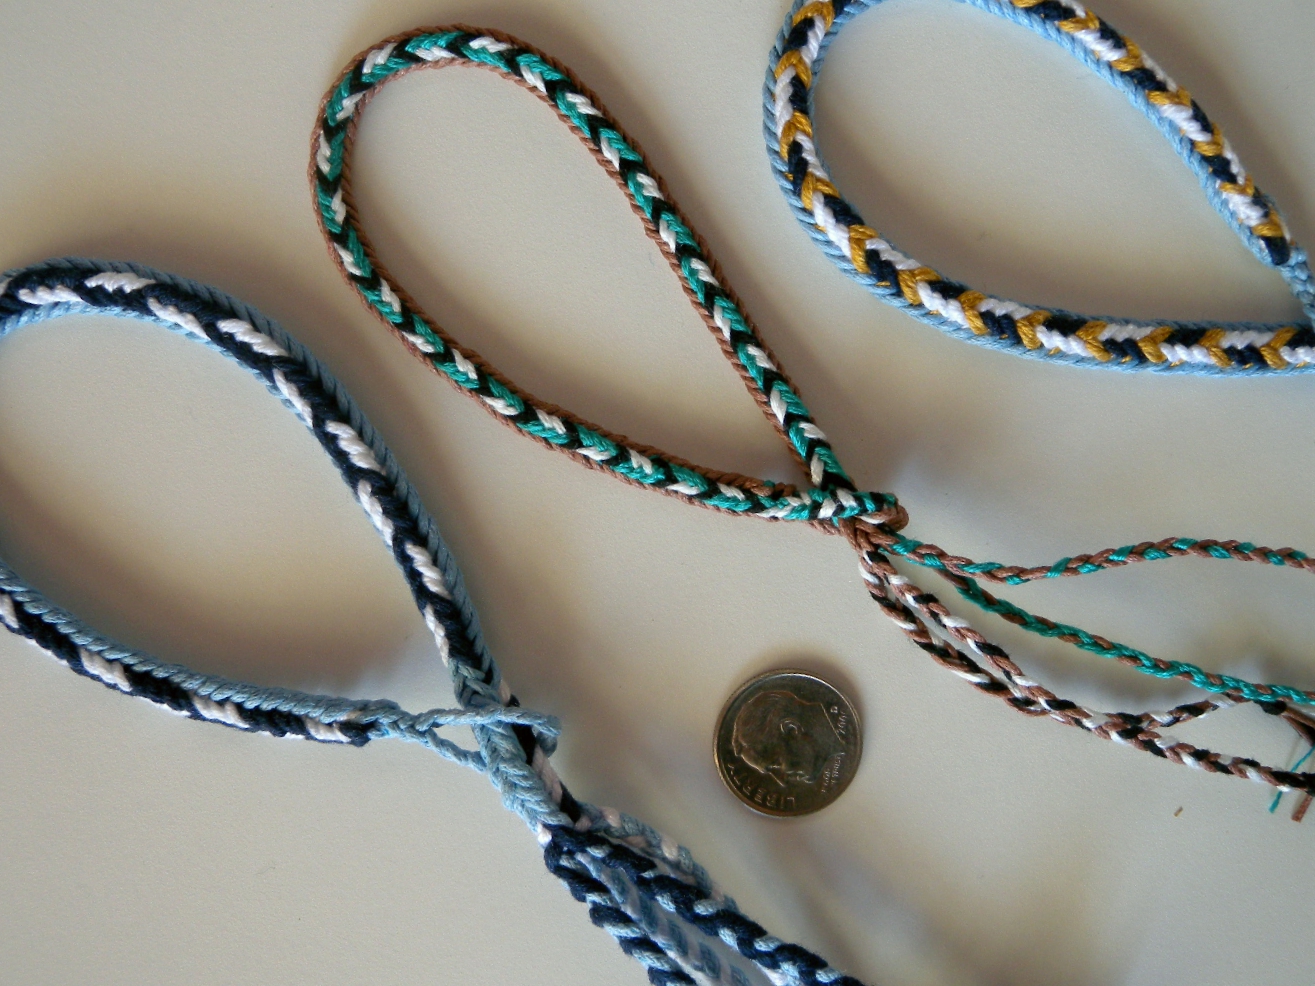
Here are some examples where I used a coarse linen weaving yarn for one shank of each loop, and a cotton or rayon for the other half. I’d like to try this with hemp, too (none of these are difficult to tighten, btw):

10/4 linen, and mercerized cotton knitting yarn in 2 colors: black and variegated (orange-to-turquoise).
Reverse side. (The variegated yarn changed color from orange at the top to turquoise at the bottom of the braid.)
10/2 natural color linen, plus viscose rayon (from a single spool of variegated color thread)
Reverse side.
The video below demos how to make both variations of this Unorthodox braid (turning loops and not turning loops).
D-shaped 7-loop braid, 2 ways:
Drag bubble under video to 6:25 to skip the intro and start watching the basic moves of the braid
Starting loop color set-up for both braid patterns in video:
7 loops: 4 bicolor blue/black loops; 3 bicolor blue/white loops
A=index, B=middle, C=ring, D=little finger
Left hand: A,B,C,D fingers each hold a bicolor blue/black loop, black shanks in upper position.
Right hand: A,B,C fingers each hold a bicolor blue/white loop, white shanks in upper position.
Note: In this video I don’t explain the moves that are the same as 7-loop square braid moves – review that video if anything here is unclear. If you are new to loop braiding, it’s best to learn the 5-loop braid first.
Video Timeline (skip to 6:25 to go to the braiding moves):
00:00-5:45 Introduction to the D-shaped “unorthodox” braid, and its two variations (turned vs not turned loop transfers). I show several D-shaped braid examples in various color-patterns, before starting the braiding instructions.
3:45 Here I show the two patterns I will be braiding in this video, first the first pattern, made without turning loops.
4:32 Quick view of second pattern (made by turning the loops)
5:45 Starting the braid (see loop color set-up instructions just below the video window).
6:26 First move (left loop transfer)
7:45 Faster moves.
9:14 Loops are back in starting set-up positions, ready to start second braid pattern.
9:34 Showing the second braid pattern that I will now be braiding.
10:17 1st move on left, with the loop now being turned as it is transferred. (Be sure to turn the loop ‘from above’ rather than ‘from below’).
11:08 One ‘unbraiding’ move
12:38 Faster moves, new pattern appearing on braid…
13:19 How to error-check
13:38 Showing new pattern emerging in braid, front and back.
Then comparing to orange,black,white braid in which I switched occasionally to turning loops for just one pattern repeat, and then returned to braiding without turns.
15:08 Reprise of turned loop procedure.
Talking about why this is considered an “unorthodox” braid
(16:07 Noticing I forgot to turn a loop when taking it, correcting mistake.)
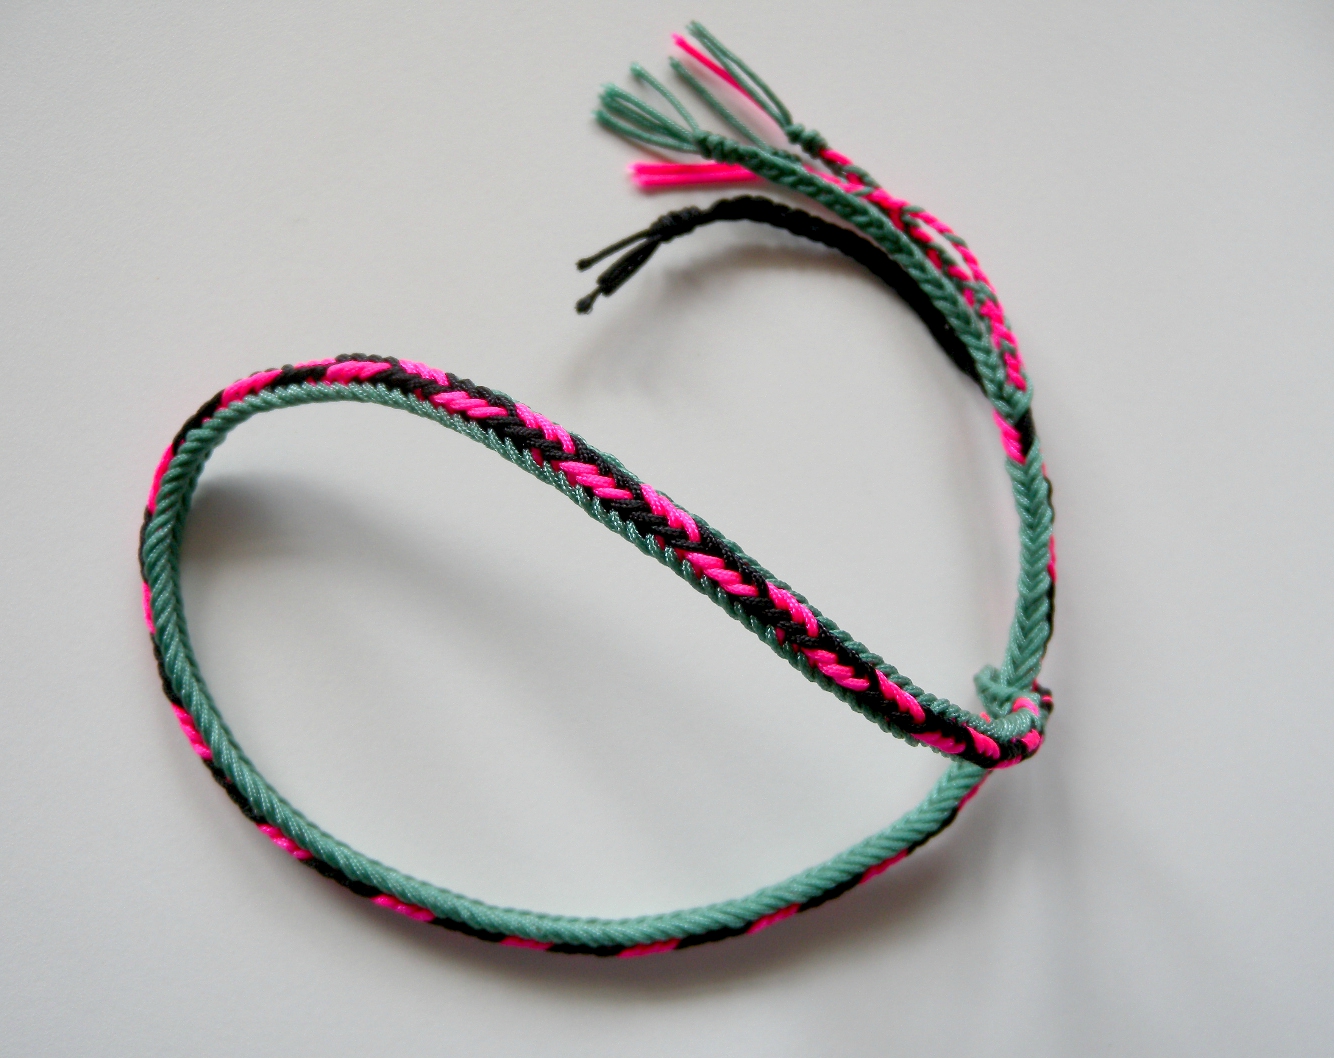
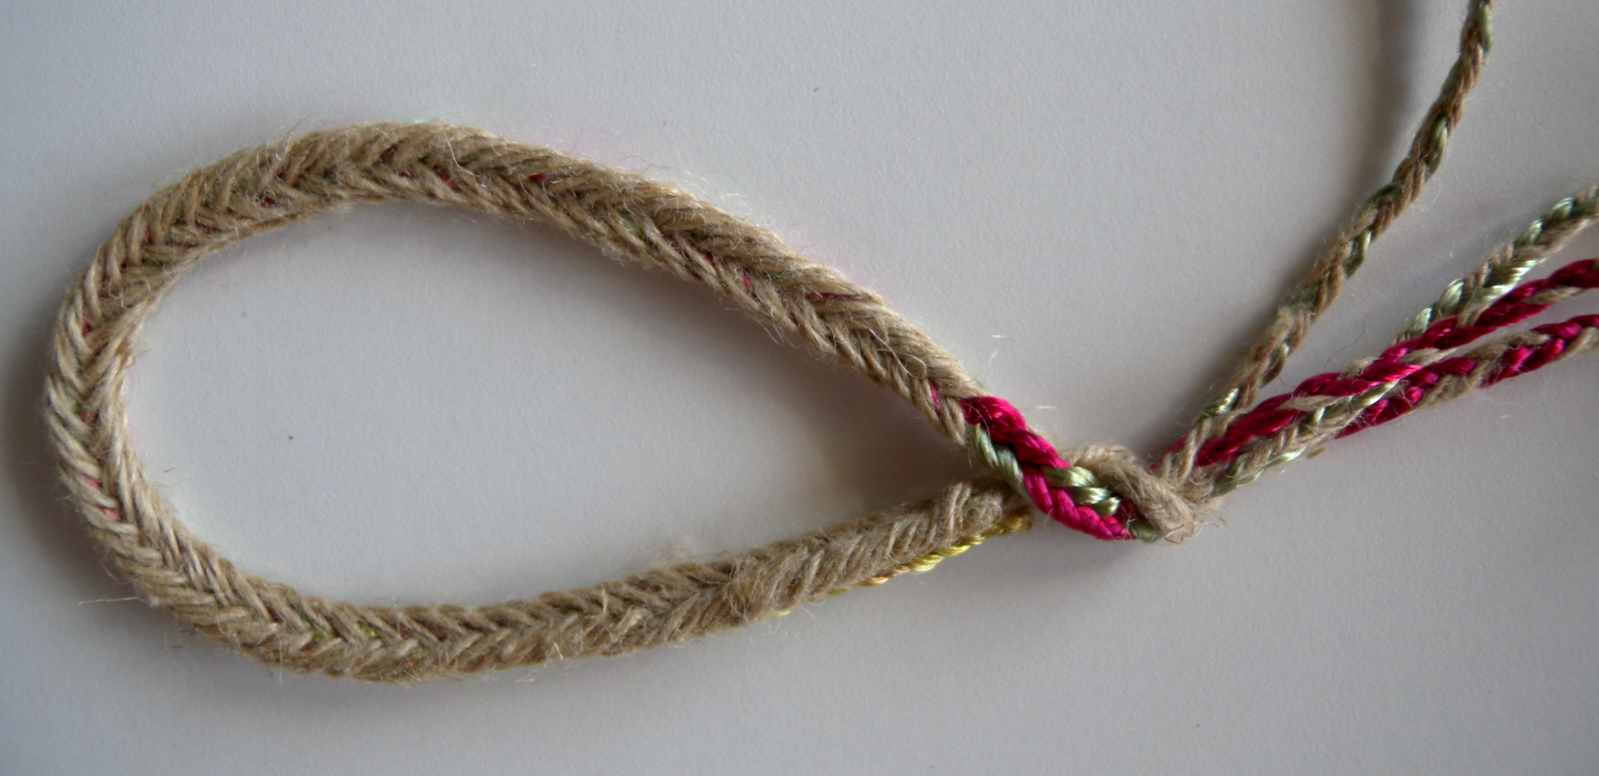
The braid below has a matching fringe of mini-braids at both ends. This is a nice finish for many braid uses—lanyard or necklace, drawstring for a bag, bracelet, laces, etc:
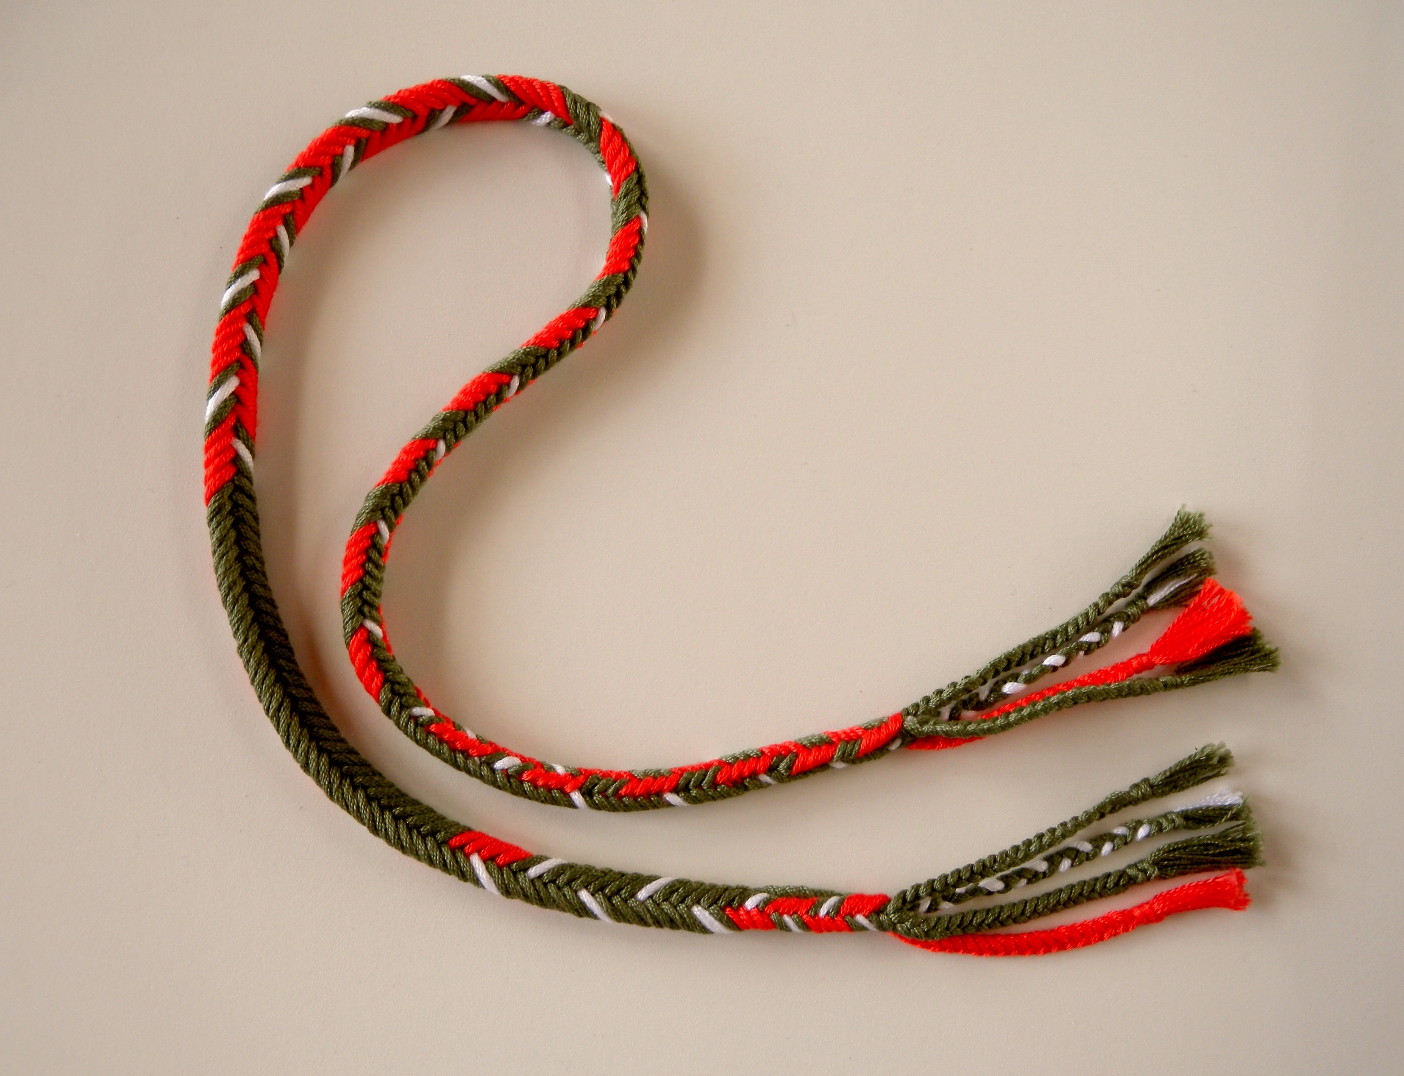
7-loop D-shaped braid pattern sampler with matching ends. Each end has a loop (buttonhole-type opening) just above the fringe, though these aren’t very visible in photo.
I have more details about how to start and end with matching tassels in my post Longer Loop Braids and Starts With No Ends.
*1. Noémi Speiser came up with the term “unorthodox” for these braids because they are made with a combination of two types of braiding moves (usually “through-loop” and “over-loop” braiding moves). That kind of combination makes the structure of the finished braid very complex and difficult to analyze. But the braids themselves are not necessarily uncommon or difficult to make at all. The most common loop braid worldwide is a 5-loop unorthodox braid. It is even easier to make than a 5-loop square braid, because you only have to insert the working finger through one loop, rather than two. (To the person doing the braiding, passing the working finger over a loop is a relative “no-brainer” compared to inserting it through a loop—you think of the first as “skipping” a loop, rather than doing something to it.)
For more about Unorthodox braids, hover on the About tab in my upper menu, and click on Unorthodox Braids in the drop-down menu.
*2. In the more well-known type of UO (unorthodox) braid, it’s the loop or loops near the center of the braid that are “skipped over” by the braider. The operating finger (and therefore the loop that it transfers) only goes through the loop or loops closer to the outer edge of the braid.
It’s exactly the opposite for the type of UO braid in this tutorial: Here, it’s the outer loop (or loops) that is “skipped over” – the loop nearer to the edge of the braid. The transferring loop is only pulled through the two loops that are closer to the mid line of the braid. It “skips” above a whole loop at the edge of the braid, rather than going through it as it would for a square braid. This makes a noticeable difference to the resulting structure and appearance of the braid.
There’s a reference to a 5-loop example from Siberia, and a reference to two 7-loop examples from the Wayuu culture in Columbia – both references are on L-M BRIC. [L-MBRIC is currently only partially on-line, click here for updated info.] Here is a note by Masako Kinoshita in LMBRIC issue 2 about a braid from NW Siberia:
TIE STRINGS ON A COAT OF THE KHANTY PEOPLE IN SIBERIA
Another l-m [loop-manipulated] braid specimen to add to the World Distribution Map of L-M Braids was found among the ethnographical costume collection of the National Archeology and Ethnology Institute in Novosibirsk, Russia. They are a couple of pairs of front closure strings attached to a jacket of the Khanty people who live in northwest Siberia, along the River Ob. The braid made of wool-like fiber exhibited the most obvious characteristics of an UO [unorthodox] braid, having a 2-ridge braid on one face and a 4-ridge braid on the other…The Khanty braid, however, is round on the four-ridge face and flat on the two-ridge face in contrast to the most often reported UO (here I tentatively call UO No. 1), which is flat on the four-ridge face and round on the 2-ridge face…
UO above means Unorthodox finger loop braid. This is not two braids later combined together, as you might think from Kinoshita’s description. It is a braid with two visible columns (ridges) of slanted threads on one side, and four visible columns of slanted threads on the other, like the braid I am teaching in this tutorial.
In the unorthodox braid of this tutorial, the flat bottom surface has only two lengthwise columns (ridges) of slanted threads.
This shows the two lengthwise ridges of the flat (lower) surface of one of my D-shaped unorthodox braids
The threads in the two ridges have opposite slants, so together they form upside-down V’s down the braid. On the upper surface of the braid, 4 lengthwise columns/ridges are visible (creating busier color patterns on the top of the braid than on the bottom). The 4-ridge side is rounded, and the two-ridge side is flat, as in the braid Masako Kinoshita describes.
There’s a photo of the Khanty braids alongside her description, but it’s not detailed enough to see the braids clearly. The closeup photos in her article are not of the Khanty braids – they are of a 5-loop reproduction Kinoshita made (using nylon cord). Masako Kinoshita’s more detailed description of the way she braided her hypothetical reconstruction is near the end of the page in the Illustrated Instruction issue that accompanies this issue of L-MBRIC: “illustrated instruction series #2“. This is exactly the type of Unorthodox braid I’m teaching here, though done with 5 loops rather than 7.
Even the “regular” type of unorthodox braid has some surprises when done with the V-fell braiding method that I teach on this site. I plan to make at least a few more tutorials on those as well, for various numbers of loops.
(Things get complicated with A-fell, V-fell, and Slentre braiding when it comes to the resulting shapes of their unorthodox braids—which ought to be identical, but aren’t!)
*3. I tighten this type of stiff cord very firmly and repeatedly while my hands are spread apart, but I don’t hold any tension at all in the loops the rest of the time. I don’t tighten this way with normal thread or yarn, only when using stiff cord that is hard to tighten. (I am not sure this would work well with stiff and very slippery thread like nylon beading thread, though – haven’t tried it yet. Waxed cotton and chinese knotting cord are stiff, but not so slick and slippery.)
Try to let the loops hang somewhat slack as soon as you begin to bring your hands together after tightening. This makes it harder to do the braiding moves, unfortunately. But in my experience with this type of stiff cord, getting an evenly-tensioned braid is very dependent on the bends/creases you make in the cords each time you pull the loops out to the sides, so it’s best not to undo and and straighten out those creases by pulling the loops tightly towards you during the next move.
My first ‘Unorthodox’ braid tutorial! This is a 7-loop, D-shaped braid with a rounded upper surface and a flat lower surface. Like most Unorthodox braids, the upper surface usually looks very different from the lower surface…
Last updated June 16, 2020
© 2015-2020 Ingrid Crickmore
See full copyright restrictions and permissions at the bottom of the sidebar (if you are on a small screen device, the ‘sidebar’ may appear somewhere other than at the side of the screen).


This is so amazing!! I’ve only done the 5-loop braids (with my kids when they were younger and just picked it up again recently) only varying the colors on each braid. Never heard of unorthodox braids. You are so so knowledgeable and informative. She to try the D shaped braid. Thanks so much for all the time and work you put into this.
You’re welcome and thanks for the note! I hope you have fun with D-shaped braids!
Hi Ingrid, I absolutely love your braided cord and colours. Do you maybe sell your braids? Im looking for hand braided cords in 1m lengths. Please get in touch if you do.
Thanks for the compliment! Sorry, no I don’t sell braids, at least never have. What do you use them for?
I know you always recommend to start on the 5 loop braid for beginners, but I jumped straight to the D-shape and it’s by far my favorite braid. I love all your tutorials, they are very thorough and informative. I’m looking forward to your other 7 loop OU braid tutorial when and if you post it!
Thanks! I love these UO braids, too! and yes, I am working on that next tutorial right now after a long blog hiatus. It’s written up, but I’m hoping to get just a few more samples made, then the photos and video. It should be out in a week or two (fingers crossed! If not, it’ll have to wait til I get back from our Aug camping trip).
I absolutely love this 7-loop UO braid; this braid, and the spiral ones, are my favourites ones so far. Thanks again for all your hard work on this super website.
Yay! (I love this one too!) That’s great that you’ve been learning so much from my blog! Maybe your note will help me get going on another 7-loop ‘unorthodox’ braid tutorial that I’m kinda stalled on. It’s made almost the same way but comes out with more of a wedge or blunt triangle-shape. It has some great color patterns, too! I’ve braided a lot of samples and written up most of a post, just have to work on the video and photos…
Don’t see how anyone could complain about the knowledge you are freely sharing. I’m with Sidsel: thanks for all the joy you spread!
You’re welcome and thanks for the nice note!!!
Reblogged this on The Middlegate Cryer.
Just finished my first unorthodox braid. I really like it. Started divided to get my fingers going then on to straight through then turned. Mi think I like the look of the turned braid, but really both are nice. Used 5/2 cotton. Think I will try some hand spun (it’s tightly spun for braiding) as that will make a bigger braid and show colors better. Will send along a picture later. Thanks so much, Ingrid for sharing this Braid!
Connie
Yay, I’d love to see a picture, Connie! (When you send it, please let me know what your color arrangement was if you happen to remember!). I’m planning to put up a tutorial for another kind of unorthodox braid sometime soon too–well, relatively soon–might end up being later this summer. One side is flat, like this one, but the other side is triangular rather than D-shaped. It’s a great shape, too, and the color patterns come out a bit differently on it than on this Dshaped one…
Ingrid, thank you again for your sharing all your leidenschaft with us.
I read your comments and footnotes and got interested in slentre versus your way. And so I tried the slentreWay on the sevenloopbraid. And it works, you have to turn the loop you take, but it works. I taught the slentre way to 9 to 12 year olds, they love it. We do three different patterns: braid like, “round” and “one side braided, one side “knitted” “, all with five loops.
Im looking forward to the colorpattern for the redwhiteblack, or maybe Ill be able to find out how you do it..
I recommend you to my pupils, even if they dont speak much english yet, its very good, that you use a lot of words, and the time you take to explain is wonderfull, no hushing, so everybody can land and know, things take time. danish greetings from germany, sidsel
(yes, I got your braidingbook, it all worked fine, thank you.)
Hi Sidsel, it’s so nice to hear from you again! I’m glad to hear you tried the braid a different way than I demo’d, good for you! The slentre method should work fine for 5 and 7-loop unorthodox braids. Your students are lucky to be able to learn braiding in your class!
The slentre braid you describe that looks knitted on one side I’m fairly sure must be the other type of unorthodox braid, in which you skip the first loop and only go through the second. (For a 5-loop braid–for a 7-loop version, you could also try skipping the first loop and go through both the second and third loops to get the little finger’s loop.) Your round braid is perhaps like the one I call square? I am curious about the one you say looks “braid-like”!
Thanks for trying this tutorial!! I will post the pattern for the red/white/black braid soon.
Happy braiding,
–Ingrid
Hi Sidsel, just wanted to let you know that the instructions for making the red, white, black D-shaped braid are in my most recent post: One setup; four color-patterns. I hope you like it!
Hi Ingrid, yes, I already tried the blue-golden one! And turned it on to slentre-ways, and ended it doing through all loops and grab the last: one side as orthodox, one side broad braid simple way. By braid I mean the hairbraid sort of simple way, but here its a braid of plenty;-) Your patterns simply beg for being made, and this double-side-thing ist so wonderful, nobody grasp how it could be made.
My sisterinlaw wached your tutorials after I showed her how to start up; she just mailed to say your homepage/tutorials are so good, that even no-english-speakers have joy!
Now I must look for other yarns, so the patterns will come out better. Thank you again for all the joy you spread.
Thanks, Sidsel!
Well, i’ve just bookmarked your video! I shall try this one when I get an hour to myself next week.
I’ll let you know how i get on!
Yay! If anything isn’t clear in the video, check out my 7-loop square braid video. This D-shaped braid is just a slight variation of the moves for a square braid. Good luck and happy braiding!
Ingrid, these are phenomenal braids. I am going to have to try some. thanks so much!
Hi Connie! Thank you! I think you’ll love these braids, they are easier than double braids, yet just as fun and rewarding. I’ll get going on posting the setups for those other color-pattern variations soon!
Ingrid,
These are very handsome braids. Thank you for the posting.
Hi Valerie, You’re very welcome, and thank you so much for visiting and commenting!
Thanks for such a FANTASTIC piece of work on these braids. I thoroughly enjoy your videos which are an information pill on the technique – and can happily learn from you, rather than ( ..it would take me years!) from a book. Again, thank you.
Awww, thanks for the compliment! And it’s a relief to hear you enjoy the videos, I tend to be so overly wordy that I get my fair share of of complaints on youtube (youtube viewers don’t hold back the way blog-readers tend to!) I hope you try the braid, it’s a very fun variation of a 7-loop square braid with a distinctively different look.