Thanks Chris, Caroline, Dan, Terry, Traci, Colleen, Faustine for sending me your braid photos!
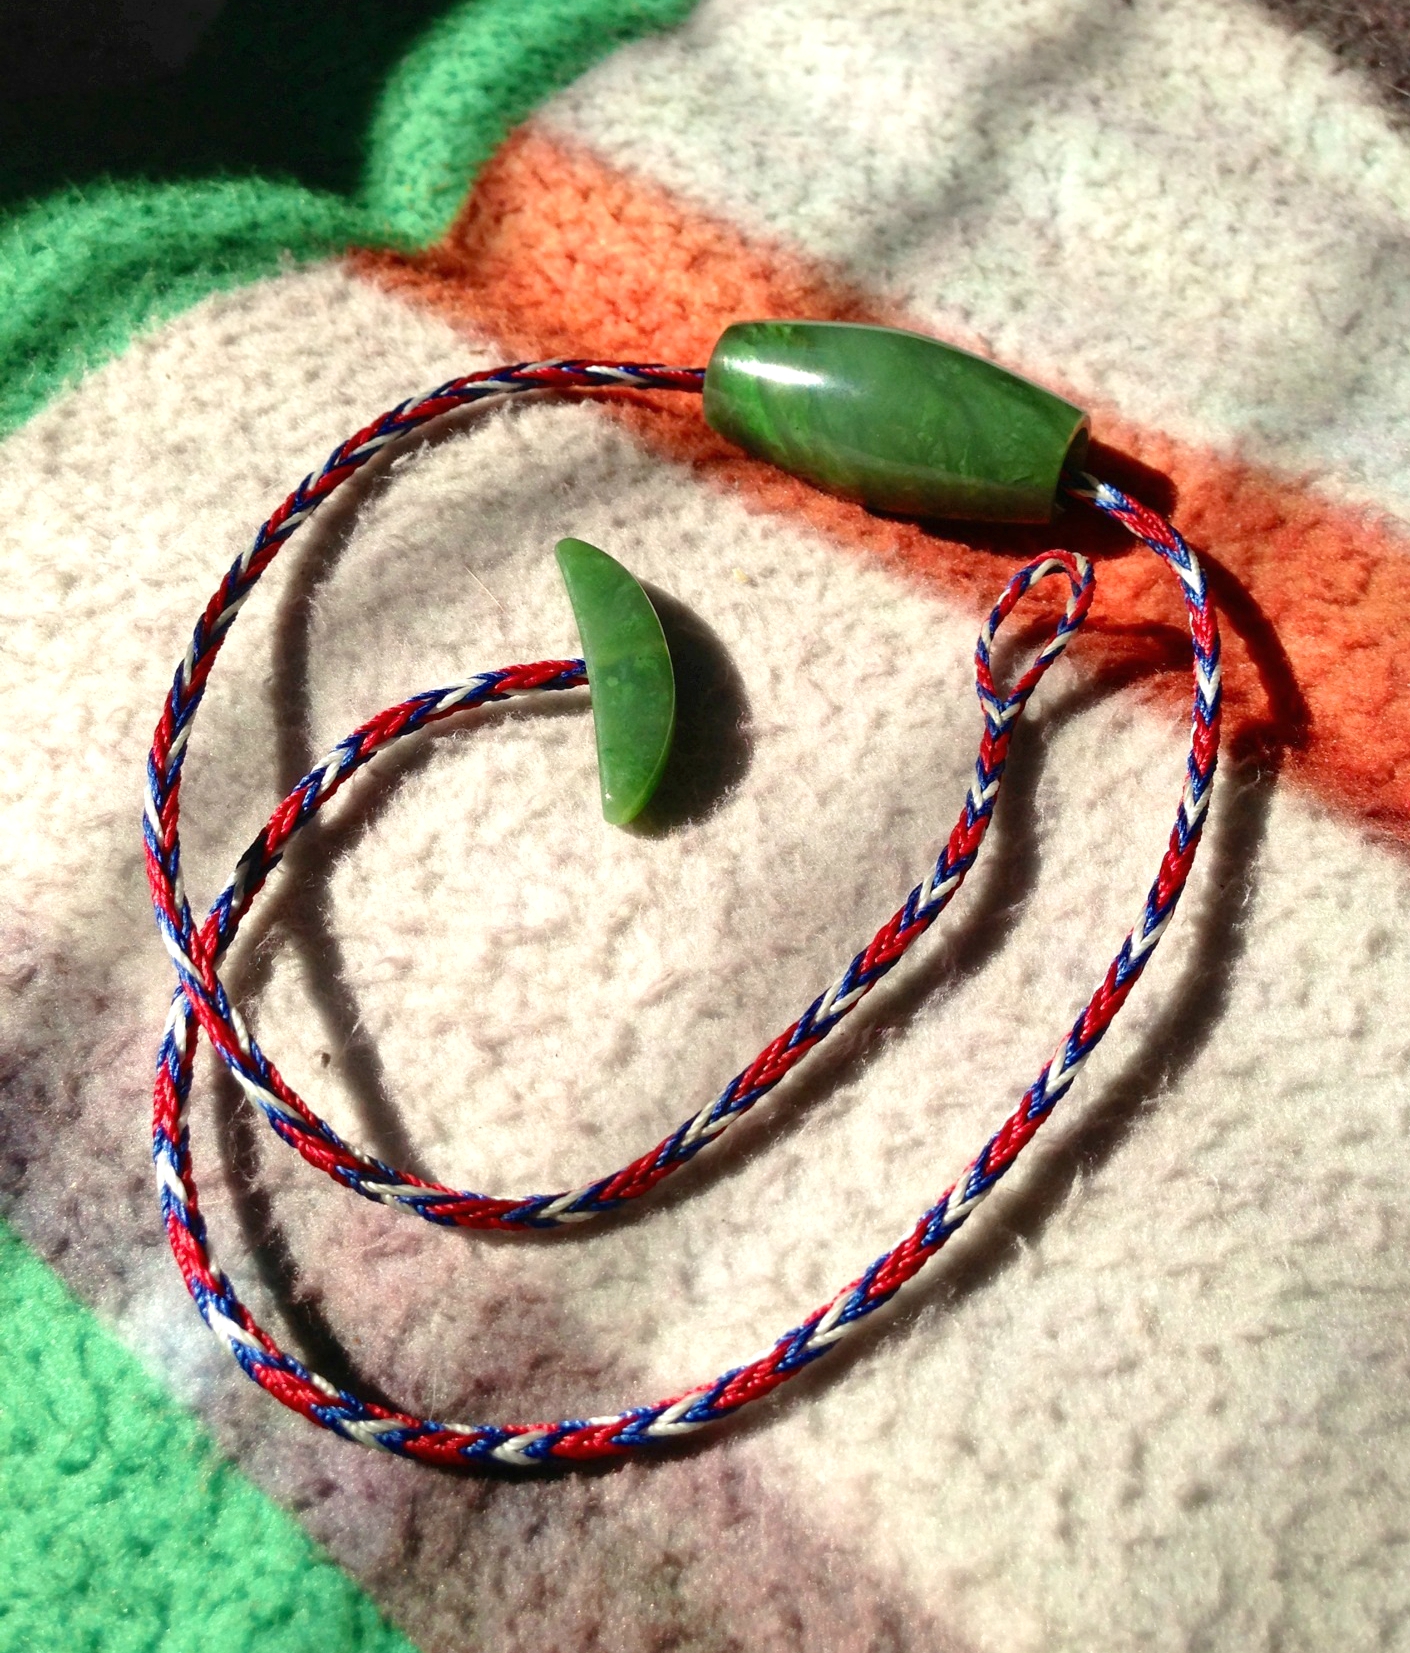
Necklace by Chris Kurtonic, bonded nylon cord and gemstone bead. 5-loop square braid.
Chris Kurtonic contacted me when he had just started loop braiding, and asked me about using C-lon thread—a fine, bonded nylon cord often used for beading. He wanted to make necklaces with it. C-lon makes much more durable jewelry than cotton or silk—almost heirloom quality, according to Marion Hunziker of Jewels in Fiber. It’s also about the most difficult material I have ever braided with. It’s stiff, slippery and very hard to tighten. I tried to hint to Chris that maybe he should start off with a friendlier type of thread! No go. Within a week Chris had produced more braids than in the montage below (including the necklace above):


Since that first week, Chris has been making even more. Great color combinations, and meticulously-made braids! I love his closures—those bold beads make great-looking toggles. The toggles and beads are high-quality jade, made by Allan Spehar, a friend of Chris’s. The way Chris sometimes forms a loop by doubling the braid over and tying it down with a tight, neat whipping makes a strong loop as thick as the rest of the braid, and also covers any messy bits at the end of the braid. (In a class I took from Marion “Jewels in Fiber”, she recommended using a tiny drop or two of strong glue as well.)
Chris admitted to me that braiding with C-lon was “torture on the hands” but that obviously didn’t stop him. In his most recent message to me he said: “I am having fun with the C-lon.” Goes to show that you shouldn’t listen to advice from teachers, go ahead and braid what you want to braid! Obviously Chris had a goal and vision for his finished pieces from the beginning, and the bonded nylon is perfect for them.
Traci Scachette braids jewelry with another very difficult material—horsehair. Whiskey River Designs is her online business. She was an experienced horsehair braider before she started loop braiding, but tells me that loop braiding has now become one of her favorite ways to braid with horsehair. What’s used are the tail hairs—multiple thin strands, each strand slippery, strong and very resistant to tightening. [edit: Traci just informed me she can get blisters and backstrain from the tightening!] Here are some photos Traci sent me of braids she’s made using loop braiding (some learned from this site):


Her website has several others. Check them out—some of the most impressive-looking pieces are loop braided!
Caroline Spinali sent me some photos of her two beautiful 7-loop Chevrons-over-bicolor-stripes braids not long after I posted that tutorial. It was so great to see her braid photos in my inbox!
Great colors in both braids! I love the flame-like gradation of colors in the chevrons of the bracelet on the right.
Both square braids start out with 4 bicolor loops on one hand and 3 single-color loops on the other hand (yet look how differently they turn out!).
Terry Nimmer contacted me shortly after starting loop braiding. He had a lot of ideas for using findings and beads with his braids. Beads are something I’ve been very interested in, but haven’t explored much. Terry sent some cogent words of wisdom on this* and wasn’t afraid to show me pictures of both experiments he liked and ones he didn’t.
Here are some of his photos:


I think the braid above with the sparkle accents had a contrast thread of yarn that came prestrung with tiny beadlike accents—I love how it turned out, and this is another reminder to me to expand my fiber choices!
Even though Terry himself didn’t end up being a beading fan, I think his beaded braids turned out great, and they really make me want to me want to try it. I hope his photos, and his notes below, give other braiders an incentive to try it too.
[update May 2014: I finally did try it, see my recent Braids and Beads post.]
(I wish I had taken pictures of the fun beaded touches that two teenagers at a recent music camp had added to the loop braided bracelets and anklets they made after learning loop braiding from me the previous day. I think they had added a few beads while braiding and a few after the braids were done. I only got a brief glimpse on their last visit to my campsite, and I didn’t have my camera handy. One fun ‘bead’ was a tiny human stick-figure of bronze-colored metal that you simply bent onto the braid as if he were hugging it.)
Dan Gaiser was the first of only two readers to send me photos of his solo-braider double braids since I posted my tutorial for them last December. Really made my day—maybe my week, even! He turns his intricate experiments into bookmarks. He also sent me pictures of some great 3-color braid patterns he came up with for the 7-loop Spanish braid.


The intricate openwork bookmark above of white, green, and blue is Dan’s most recent experiment, where he really played around with various double braid shapes—especially with the various ways you can divide a double braid. I happen to know that it is very tricky to get those divided/separated openwork areas to come out as neatly as this when braiding solo, btw! Dan also did some very clever controlling of the color-flow of the braid—nice!
Faustine Ferhmin learned loop braiding in France, first from a friend and then from this and other websites. Here are some of her beautiful loop braids:


Right now, Faustine is in the middle of a camping and textile expedition here in the western U.S.—traveling by bus, with a suitcase containing a hammock, a sleeping bag, and several skeins of embroidery floss! In just the last couple of months, she has already been to a weaving and braiding conference in Washington state (ANWG), met up with me to braid on Washington’s Olympic Penninsula, studied ply-split braiding and tablet weaving with Linda Hendrickson in Oregon, and will be in Rodrick Owen’s upcoming braiding workshop in California.
Faustine had planned to look me up after she reached California, but through an amazing coincidence, in early July she and I managed to meet several hundred miles from my home and several thousand from hers. She took a ferry over to the Olympic Penninsula from a nearby island, and we braided amid trees, tents, dogs, and curious old-time music fans.
I just found out that Faustine is now braiding 10-loop double braids, using her thumbs! The cool thing about this is that her thumbs are completely straight, unlike my overly-curved ones. When I met Faustine in July, she was convinced that it was impossible for a straight-thumbed braider like her to hold loops with her thumbs the way I do. Now she says she has gotten used to it and it works fine!

Faustine Ferhmin, 10-loop double braid, detail view
On that note, I ran into an interesting post by Victoria, of the textile craft blog Alcarinwe.


Victoria shows photos of some nine-loop (thumb) braids she learned from this blog, as well as a gorgeous 15th C. loop braid called Lace Maskell that she learned from Cindy Myers’ Silkewerke site. She also shows photos of an interesting combo she devised of a seven-loop braid and a two-loop braid (see her post!). Victoria also came up with a 9-loop (thumbs) version of a flat braid that I have seen elsewhere online with fewer loops, and have been intending to mention when I ever get around to posting more about my “warp-faced plain-weave” braids! (Her plain weave flat braid is a different type than the ones in my post, not repp-like at all, but has a move that I also used.)*
I’m finishing with a favorite braid photo from the past. It had been lost in my computer for years, I just found it by chance recently:
Colleen O’Brien is Canadian, and she learned loop braiding from me at a casual drop-in workshop at one of my music camps. Later I got an email from her with this subject line:
Hot damn! I remembered!
Inside the email was a photo of the braid she had managed to remember after she got home. (This is not a trivial accomplishment, btw—I couldn’t remember how to do it a few days after I was first shown how to loop braid!) Here’s her note:
Hey Ingrid: Attached is a photo of the fiddle friendship bracelet I made for my friend in Métis-sash colours.*

Colleen O’Brien, 5 loop square braid with divided loophole
It looks fantastic on the fiddle!
—————Notes————
* The flat braid that Victoria of Alcarinwe came up with (she photographed it with a green contrast-thread inserted to mark how her fingers pass through the loops) has a move that Masako Kinoshita has called “upside-down” for every other loop the finger passes through. These are where the operator finger passes through a loop in the opposite direction to the way a finger would normally pass through a loop when making a square braid. (I won’t say anything more about this for now!)
——————————-
* The Métis sash, worn around the waist and also known as assomption sash, Voyageur sash, or ceinture fléchée—is a potent French-Canadian, Métis, and certain First Nations/ Native Americans symbol, traditionally made by very painstaking free-end braiding (a type of braiding often called “finger weaving”).
——————————-
I apologize if anyone out there has sent me braid photos and didn’t see them in this post—Please contact me again! I let too much time go by since my last readers’ gallery—several of the photos above had sunk into my email archive folder, not to mention my own memory’s archive folder, both of which are very difficult to search!
——————————-
* re beading: With loop braiding there would be a few different possible ways to load the beads into the braid. Here’s what Terry emailed after making his first beading experiment:
I added beads to the loops as I went. This requires pulling the loop through the bead which means knots [at the bottom of the loops] won’t work. It would be much easier and quicker if the beads could be added ahead of time. My next experiment will be to add beads to a shank before starting and then push them into the braid as needed.
Here’s the next message from Terry:
Here’s a braid with beads threaded on the loops ahead of time. It’s an 8-loop Spiral braid. The dark pink loops were unbeaded, I only added beads to the light pink loops. It can be done and is much easier than adding beads during braiding.
My thoughts:
1. Beads are heavy. I can’t tighten enough to keep them in place well.
2. Beads work better after a twist than before. I added beads on both the right and left hand loops. When I pushed the bead down to the braid, the twist in the loop (on the right hand) tends to hold the bead in place. When there is no twist (left hand), the opposite shank pops over the bead causing it to be in the wrong place.
3. Beads on each operation just cause a jumble.
Preliminary conclusion:
When making a beaded braid, the fewer beads used, the better.
I have a couple more things I want to try, but I’m still not a beading fan.
It seems to me that a lot would depend on the type of braid, the tension, and the size of the beads. In many loop braids, putting the bead onto both shanks of a whole loop could easily have a distorting effect on the braid structure, as the two shanks of a loop aren’t actually together in most loop braids, they are usually on opposite sides of the braid. (In spiral braids, the two shanks do stay together most of the time)
I was thinking this over on my way home from work today, and I began to get some ideas for ways that this “thread the whole loop through the bead” strategy might work for square (and related) braids after all…in a way that probably wouldn’t be possible in other braiding methods like kumihimo for example. I am dying to try this now, but have too many other half-finished projects that need to get done first! I also want to try the other way Terry mentioned—threading beads onto a single strand before tying it into a loop, and then pushing one bead at a time up to the braid during the braiding procedure.
© 2013–2015 Ingrid Crickmore
See full copyright restrictions and permissions at the bottom of the sidebar (if you are on a small screen, the ‘sidebar’ may appear at the bottom of your screen). Photos of any braids not made by me may not be shared without explicit permission. No content of this website may be posted or “reposted” online, sold, or used in fee-based workshops without my permission – see full copyright info.


Hi Ingrid:
Great site, and I see someone else had the same idea as me: a braided lanyard on a Swiss Army knife. But is it possible to start a 5-loop braid with a split loop, so I don’t have to resort to lark’s-head to keep the braid on the knife’s split ring? I thought I could do it, but the yarn isn’t cooperating now…
Thanks for and ideas you can offer!
Neil, in Darkest Saskatchewan
Hi Neil, I’m not 100% sure what you mean by a split loop, but take a look at my 3-loop tutorial, it demos a way to start a braid with a loop and no ends. (shown in photos in the pdf version, and in a slightly different way in one of the videos below the pdf document). This can be done with any number of loops.
Is that what you’re looking for?
Hi again, Ingrid:
That’s it! I’m just trying to start a braid with a loop. The 3-loop tutorial showed me where I went wrong. I’ll report back when I have another braid to show you.
Thanks for the reply and the assistance!
Ui, my try-new-stuff-braid even made it in here, thank you! 😀 You’re welcome to show the pictures here.
And thanks again for your great tutorials! Gave me some great inspirations 🙂
Hi Victoria, thanks! I’d love to show them here. I was very excited to see them on your blog! I haven’t heard much from anyone using my 9-loop (thumbs) tutorial, so that alone made me so happy to see that you were actually using the technique, but also your experiments are great, very interesting. I will put the images into the post after I return home, thanks for sharing them!
Hurray! Thank you for your blog. I have recently been exploring loop braiding and have been working my way up through your tutorials. … and….(drum-roll) it all started when Faustine Ferhmin and I met here in California and she showed me a simple loop braid and then introduced me to your website. I have since introduced several other people to loop braiding. Who knows where it’ll go from here.
I’m looking forward to meeting Faustine again at the end of her tour and seeing what new skills she has acquired.
Thank you both for the fun introduction to loop braiding.
PS: I’ve just started to try to use my thumbs… and it isn’t pretty (yet!… but I’ll keep tryin’).
Hi Lenora, how great!!! That’s fantastic that Faustine and now you are spreading the technique around! I just heard from Faustine that she is living with an American family and studying Navaho weaving in Colorado at the moment. I think someone could make a great Where’s Waldo takeoff about her travels, with hidden Faustines in various textile enclaves around the US!
If you have any questions about thumbs, be sure to contact me. Maybe I should even make another video–that 9-loop video is terrible, was one (or two) of my first ones. Might be time to redo it… Hang in there, and always keep those thumbs pointing up! And don’t worry about dropped loops, just pick them up and keep going–it’s just temporary, while your brain is so occupied with thinking about the thumbs.
Happy braiding!
Hi Lenora!
I’m so glad to to hear that you’ve become a loop-braider, and that you’re spreading around the technique! That’s an awesome virus… 😉
I’m looking forward to see how your braids turned out… Is Joana still braiding as well?
Saludos a toda la familia 🙂
PS : thank you Claude for starting the loopbraiding virus!
And thank you Ingrid for introducing me to new techniques.. and for turning my thumbs up 😉
Waldo-Faustine on the road…